Blog Archives
Q: What’s on the easel today?
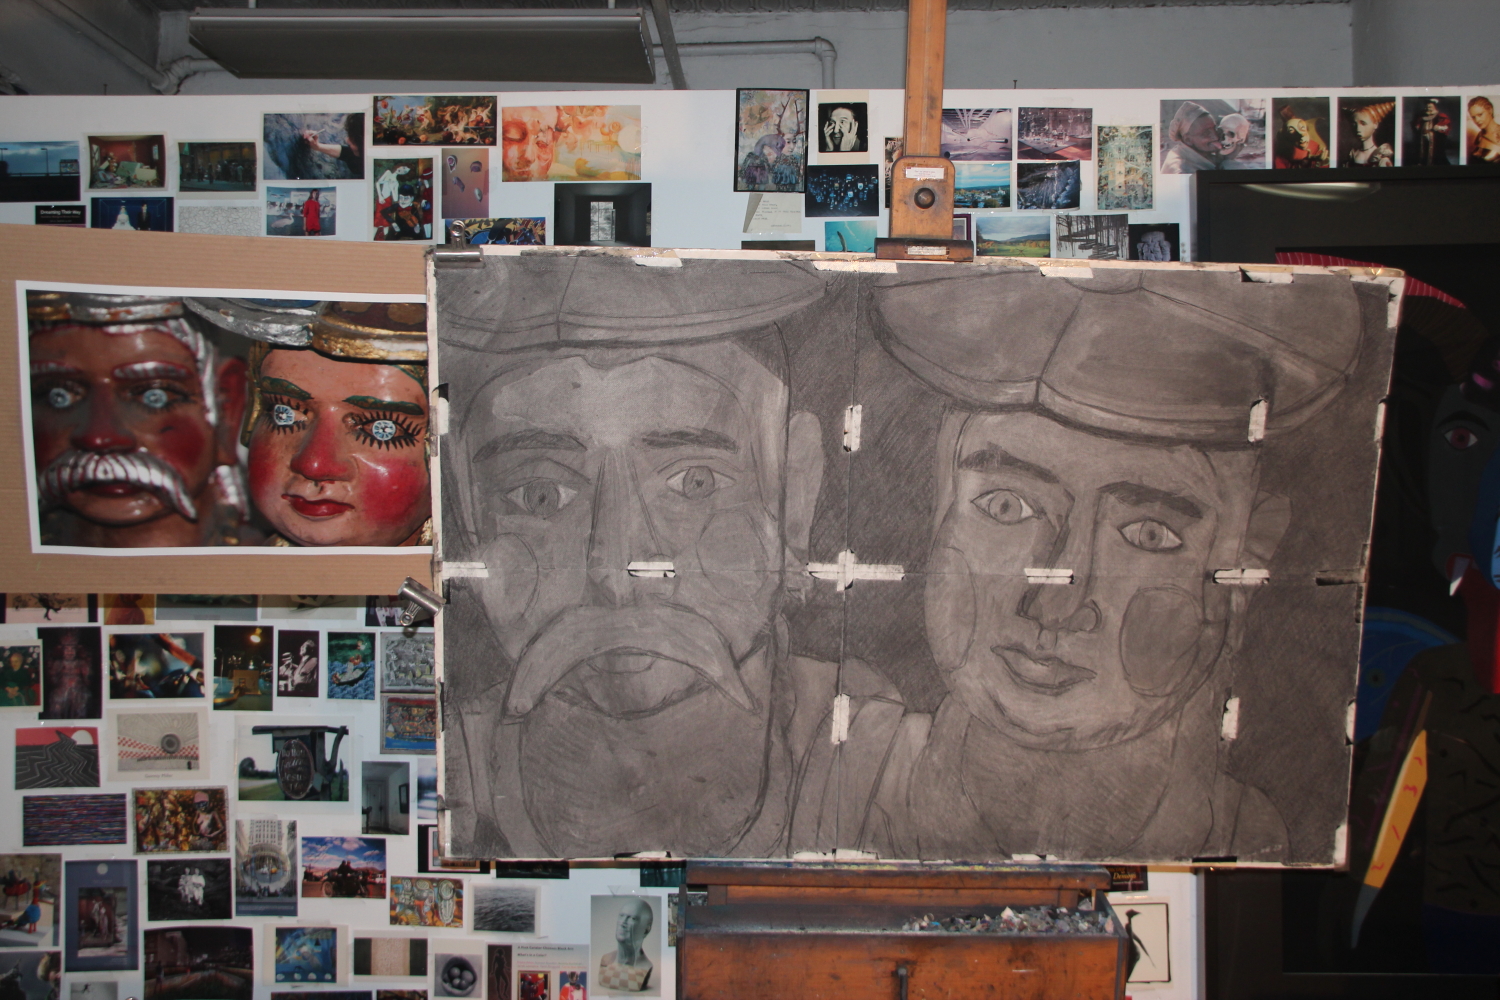
Preliminary sketch
A: I’m working on a tonal charcoal sketch in preparation for my next large pastel painting.
Comments are welcome!
Q: Can you talk a little bit about your process? What happens before you even begin a pastel painting?

Barbara in Bali (far right)
A: My process is extremely slow and labor-intensive.
First, there is foreign travel – often to Mexico, Guatemala or someplace in Asia – to find the cultural objects – masks, carved wooden animals, paper mâché figures, and toys – that are my subject matter. I search the local markets, bazaars, and mask shops for these folk art objects. I look for things that are old, that look like they have a history, and were probably used in religious festivals of some kind. Typically, they are colorful, one-of-a- kind objects that have lots of inherent personality. How they enter my life and how I get them back to my New York studio is an important part of my art-making practice.
My working methods have changed dramatically over the nearly thirty years that I have been an artist. My current process is a much simplified version of how I used to work. As I pared down my imagery in the current series, “Black Paintings,” my creative process quite naturally pared down, too.
One constant is that I have always worked in series with each pastel painting leading quite naturally to the next. Another is that I always set up a scene, plan exactly how to light and photograph it, and work with a 20″ x 24″ photograph as the primary reference material.
In the setups I look for eye-catching compositions and interesting colors, patterns, and shadows. Sometimes I make up a story about the interaction that is occurring between the “actors,” as I call them.
In the “Domestic Threats” series I photographed the scene with a 4″ x 5″ Toyo Omega view camera. In my “Gods and Monsters” series I shot rolls of 220 film using a Mamiya 6. I still like to use an old analog camera for fine art work, although I have been rethinking this practice.
Nowadays the first step is to decide which photo I want to make into a painting (currently I have a backlog of photographs to choose from) and to order a 19 1/2″ x 19 1/2″ image (my Mamiya 6 shoots square images) printed on 20″ x 24″ paper. They recently closed, but I used to have the prints made at Manhattan Photo on West 20th Street in New York. Now I go to Duggal. Typically I have in mind the next two or three paintings that I want to create.
Once I have the reference photograph in hand, I make a preliminary tonal charcoal sketch on a piece of white drawing paper. The sketch helps me think about how to proceed and points out potential problem areas ahead.
Only then am I ready to start actually making the painting.
Comments are welcome!
Q: How did you prepare yourself to change careers and work as a professional artist?
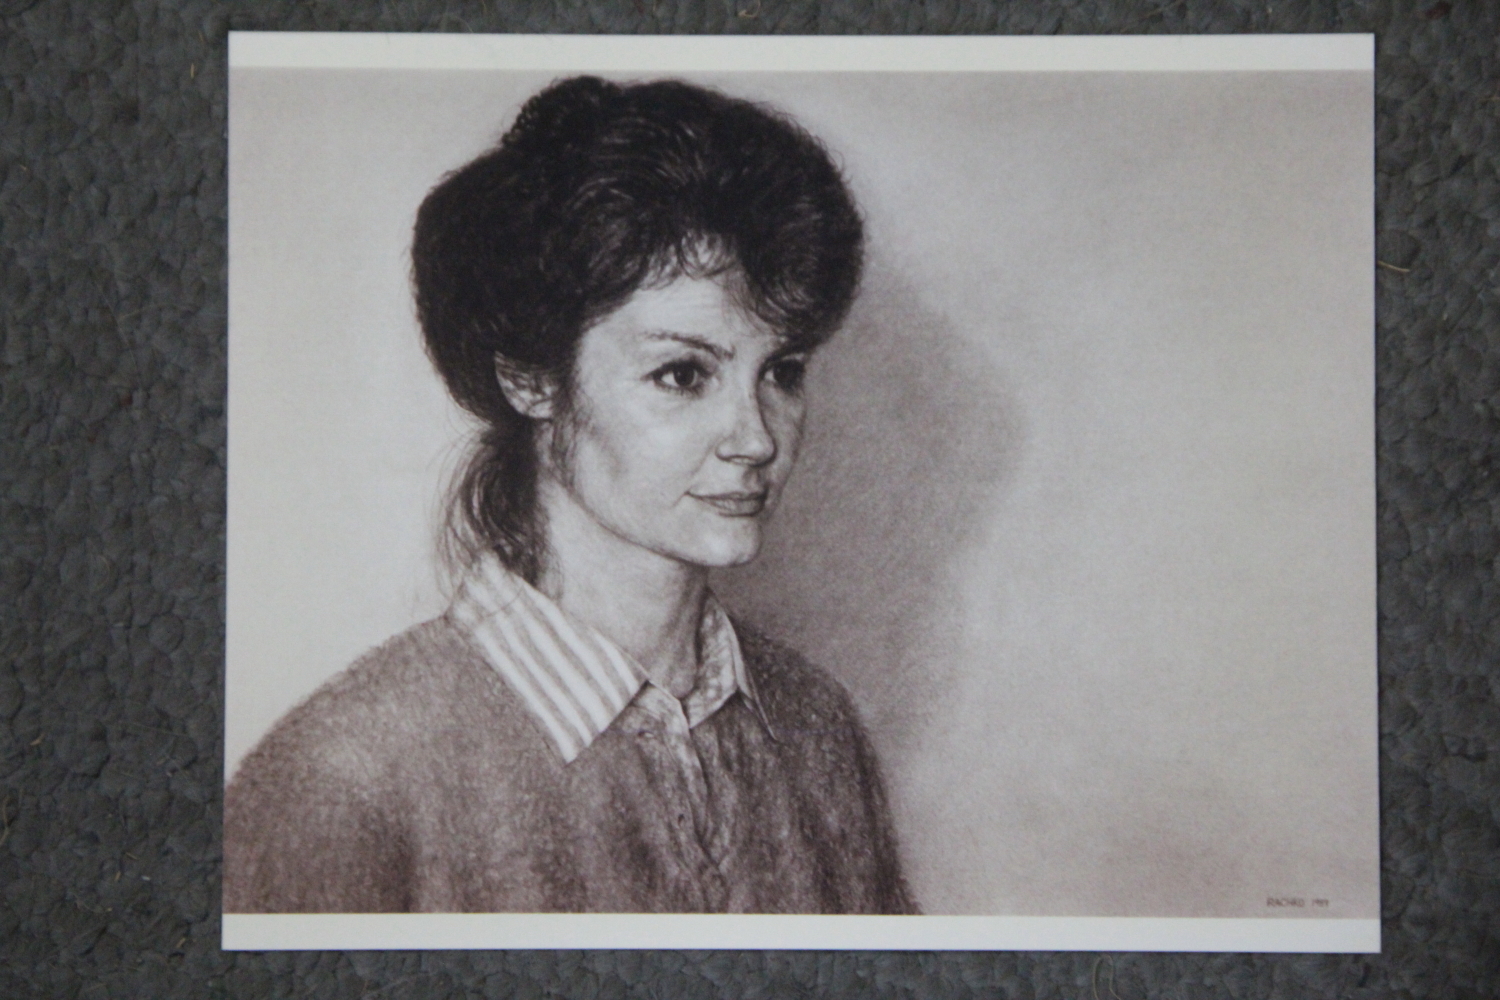
“Krystyn,” charcoal, 22″ x 30″, 1989
A: At the age of 33 I was a Lieutenant in the Navy, working as computer analyst at the Pentagon. I was very unhappy with my job. I began looking for something else to do and discovered The Art League School in Alexandria, VA. I enrolled in classes with Lisa Semerad, then spent the next two years developing my drawing skills using black and white media (charcoal, pencils, conte crayon, etc.).
After that I moved on to color media and began studying soft pastel with Diane Tesler. During this time I was still in the Navy, working the midnight shift at the Pentagon and taking art classes during the day. I was a very motivated student.
After three years or so I was getting quite proficient as an artist, entering local juried shows, winning prizes, garnering press coverage, etc. Prior to my career change, I worked hard to develop my portrait skills. I really didn’t know how I could make a living other than by making commissioned portraits. I volunteered to run a weekly life drawing class at The Art League School in Alexandria, VA, where I made hundreds of figure drawings using charcoal.
I spent a semester commuting between Washington, DC and New York to study artistic anatomy at the New York Academy of Art. I spent another semester studying gross anatomy with medical students at Georgetown University Medical School. Over time I became skilled at making photo-realistic portraits. In 1989 I resigned from the Navy and have worked full-time as a visual artist ever since.
Comments are welcome!
Q: What does your creative process look like when you are ready to begin a new painting?

Preliminary sketch
A: My working methods have changed dramatically over the years with my current process being a much-simplified version of how I used to work. In other words as I pared down my imagery in the “Black Paintings,” my process quite naturally pared down, too.
One constant is that I have always worked in series with each pastel painting leading quite logically to the next. Another is that I always have set up a scene, lit and photographed it, and worked with a 20″ x 24″ photograph as the primary reference material. In the “Domestic Threats” series I shot with a 4″ x 5″ view camera. Nowadays the first step is to decide which photo I want to make into a painting (currently I have a backlog of images to choose from) and to order a 19 1/2″ x 19 1/2″ image (my Mamiya 6 shoots square images and uses film) printed on 20″ x 24″ paper. I get the print made at Manhattan Photo on West 20th Street in New York. Typically I have in mind the next two or three paintings that I want to create.
Once I have the reference photograph in hand, I make a preliminary tonal charcoal sketch on a piece of white drawing paper. The sketch helps me think about how to proceed and points out potential problem areas ahead. For example, in the photograph above I had originally thought about creating a vertical painting, but changed to horizontal format after discovering spatial problems in my sketch.
Also, I decided to make a small painting now because it has been two years since I last worked in a smaller (than my usual 38″ x 58″) size. I am re-using the photograph on which “Epiphany” is based. Using a photograph a second time lets me see how my working methods have evolved over time.
Comments are welcome!
Q: Can we see some of your early potraits?
“Krystyn,” charcoal, 22″ x 30″, 1989
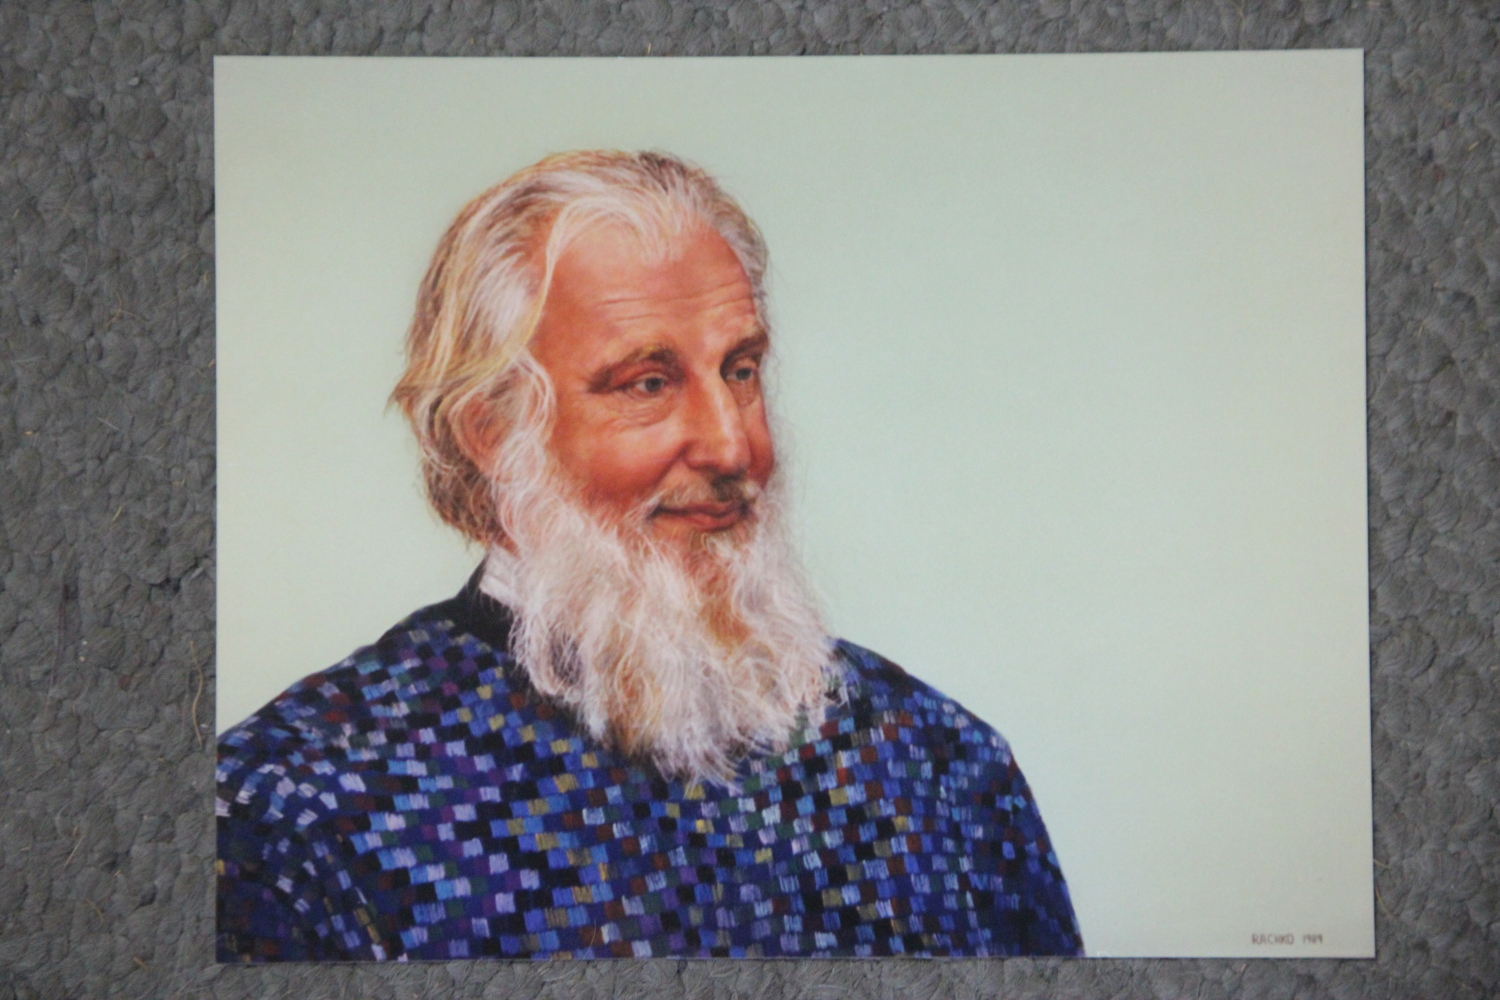
“John,” soft pastel on sandpaper, 22″ x 28″, 1989
A: The reproductions above are two of my earliest. The portrait of Bryan (see last week’s post) is hanging at the school that was named for him, Dr. Bryan C. Jack Elementary School, in Tyler, Texas. Krystyn’s portrait is hanging in my dining room in Alexandria, VA – I liked it too much to part with it. I have no idea where the one of John is now.
Note that the actual paintings are more vibrant than the 8 x 10’s shown above. For example, the background of John’s painting is a brilliant green. To obtain the images above I re-photographed photos from my portfolio book. These photos, unlike the originals, have faded over the years. That’s one more reason that my originals need to be seen in person.
Comments are welcome!
Q: You have sometimes spoken about your early work as a portrait artist. When and why did you start making portraits? Do you still do them?

“Bryan,” soft pastel on sandpaper, 22″ x 28″, 1988
A: In 1989 I was a Naval officer working at the Pentagon and I hated my job as a computer analyst. Although it was terrifying to leave the security of a paycheck for the uncertainty of an artist’s existence, I made the leap. In retrospect it was one of the best decisions of my life. When I resigned from active duty (I remained in the Navy Reserve, which provided a part-time job and a small income; in 2003 I retired as a Navy Commander), I needed a way to make a living.
Prior to this career change, I worked hard to develop my portrait skills. I volunteered to run a life drawing class at The Art League School in Alexandria, VA, where I made hundreds of figure drawings using charcoal and pastel. I spent a semester commuting between Washington, DC and New York to study artistic anatomy at the New York Academy of Art. I spent another semester studying gross anatomy with medical students at Georgetown University Medical School. So I was well prepared to devote myself to making portraits.
For a time I made a living making commissioned photo-realist portraits in soft pastel on sandpaper. However, after about two years I became bored. I remember thinking, “I did not leave a boring job just to make boring art!” Furthermore, I had no interest in doing commissions because what I wanted to accomplish as an artist did not coincide with what portrait clients wanted. I completed my final portrait commission in 1990 and never looked back. To this day I remain loathe to do a commission of any kind.
Comments are welcome!
Q: When and why did you start working on sandpaper?

Raw sandpaper
A: In the late 1980s when I was studying at the Art League in Alexandria, VA, I took a three-day pastel workshop with Albert Handel, an artist known for his southwest landscapes in pastel and oil paint. I had just begun working with soft pastel (I’d completed my first class with Diane Tesler) and was still experimenting with paper. Handel suggested I try Ersta fine sandpaper. I did and nearly three decades later, I’ve never used anything else.
The paper (UArt makes it now) is acid-free and accepts dry media, especially pastel and charcoal. It allows me to build up layer upon layer of pigment, blend, etc. without having to use a fixative. The tooth of the paper almost never gets filled up so it continues to hold pastel. If the tooth does fill up, which sometimes happens with problem areas that are difficult to resolve, I take a bristle paintbrush, dust off the unwanted pigment, and start again. My entire technique – slowly applying soft pastel, blending and creating new colors directly on the paper (occupational hazard: rubbed-raw fingers, especially at the beginning of a painting as I mentioned in last Saturday’s blog post), making countless corrections and adjustments, looking for the best and/or most vivid colors, etc. – evolved in conjunction with this paper.
I used to say that if Ersta ever went out of business and stopped making sandpaper, my artist days would be over. Thankfully, when that DID happen, UArt began making a very similar paper. I buy it from ASW (Art Supply Warehouse) in two sizes – 22″ x 28″ sheets and 56″ wide by 10 yard long rolls. The newer version of the rolled paper is actually better than the old, because when I unroll it it lays flat immediately. With Ersta I laid the paper out on the floor for weeks before the curl would give way and it was flat enough to work on.
Comments are welcome!

