Blog Archives
Q: What is your favorite thing about creating on sandpaper? (Cassandra Alvarado Oliphant via Instagram)
Ready to start
A: Undoubtedly, I could not make my work without UART sandpaper since my entire pastel technique evolved around it. I use 400 and 500 grit. My favorite thing about it is its ‘tooth’ (i.e. texture or roughness).
Over the many months I spend creating a painting, I build layer upon layer of soft pastel. Because this paper is relatively “toothy,” it accepts all of the pastel the painting needs. And as many people know, I own and use thousands of soft pastels!
Many layers of soft pastel and several months of studio time go into creating each painting. My self-invented technique is analogous to the glazing techniques used by the Old Masters, who slowly built up layers of thin oil paint to achieve a high degree of finish. Colors were not only mixed physically, but optically.
Similarly, I gradually build up layers of soft pastel, as many as thirty, to create a pastel painting. After applying a color, I blend it with my fingers and push it into the sandpaper’s tooth. It mixes with the color beneath to create a new color, continually adding richness, saturation, and intensity to the piece. By the time a pastel painting is finished, the colors are bold, vibrant, and exciting.
Comments are welcome!
Q: How do you achieve such richness of color in your pastel-on-sandpaper paintings?
“Motley,” soft pastel on sandpaper, 38″ x 58″
A: This results from the several months of studio time and many layers of soft pastel that go into creating each painting. In a sense my technique is analogous to glazing done by the Old Masters. They slowly built up layers of thin paint to achieve a high degree of finish. Colors were not mixed physically, but optically. I gradually build up layers of soft pastel, as many as 30, to create a pastel painting. After a color is applied, I blend it with my fingers and push it into the sandpaper’s tooth. It mixes with the color beneath to create a new color, continually adding richness, saturation, and intensity to the overall painting.
Comments are welcome!
Q: What is it about soft pastel that you find so intriguing that you use it as your primary fine art medium?

Some of Barbara’s pastels
A: For starters it’s the medium that I fell in love with many years ago. I recently read this article online, “What is Pastel?” by Mike Mahon, and will quote it because it neatly sums up what I love about working with pastel.
Pastel is the most permanent of all media when applied to conservation ground and properly framed. Pastel has no liquid binder that may cause it to oxidize with the passage of time as oftentimes happens with other media.
In this instance, Pastel does not refer to pale colors, as the word is commonly used in cosmetic and fashion terminology. The pure, powdered pigment is ground into a paste with a minimum amount of gum binder, rolled into sticks and dried. The infinite variety of colors in the Pastel palette range from soft and subtle to hard and brilliant.
An artwork is created by stroking the stick of dry pigment across an abrasive ground, embedding the color in the “tooth” of the ground. If the ground is completely covered with Pastel, the work is considered a Pastel painting; whereas, leaving much of the ground exposed produces a Pastel sketch. Techniques vary with individual artists. The Pastel medium is favored by many artists because it allows a spontaneous approach. There is no drying time, therefore, no change in color occurs after drying as it does in other media.
Did you know that a particle of Pastel pigment seen under a microscope looks like a diamond with many facets? It does! Therefore, Pastel paintings reflect light like a prism. No other medium has the same power of color or stability.
Historically, Pastel can be traced back to the 16th century. Its invention is attributed to the German painter, Johann Thiele. A Venetian woman, Rosalba Camera, was the first to make consistent use of Pastel. Chardin did portraits with an open stroke, while La Tour preferred the blended finish. Thereafter, a galaxy of famous artists—Watteau, Copley, Delacroix, Millet, Manet, Renoir, Toulouse Lautrec, Vuillard, Bonnard, Glackens, Whistler, Hassam, William Merritt Chase—used Pastel for a finished work rather than for preliminary sketches.
Pastels from the 16th century exist today, as fresh as the day they were painted. Edgar Degas was the most prolific user of Pastel and its champion. His protégé, Mary Cassat, introduced Pastel to her friends in Philadelphia and Washington, and thus to the United States. In the Spring of 1983, Sotheby Parke Bernet sold at auction, two Degas Pastels for more than $3,000,000 each! Both Pastels were painted about 1880.
Note: Do not confuse Pastel with “colored chalk.” Chalk is a porous, limestone substance impregnated with dyes, whereas, Pastel is pure pigment—the same as is used in other permanent painting media.
Today, Pastel paintings have the stature of oil and watercolor as a major fine art medium. Many of our most renowned, living artists have distinguished themselves in Pastel and have enriched the art world with this beautiful medium.
So knowing all this, I often wonder, why don’t more artists use pastel? Is it because framing is a big issue? Works on paper need to be framed and pastel paintings have unique problems (see my April 27, 2013 blog post). Second only to the cost of maintaining a studio in New York City, frames are my single largest business expense. Sometimes I am grateful that pastel is a very slow medium. I typically finish 4 or 5 paintings in a year, which means I only have to pay for 4 or 5 frames!
Comments are welcome!
Q: When and why did you start working on sandpaper?

Raw sandpaper
A: In the late 1980s when I was studying at the Art League in Alexandria, VA, I took a three-day pastel workshop with Albert Handel, an artist known for his southwest landscapes in pastel and oil paint. I had just begun working with soft pastel (I’d completed my first class with Diane Tesler) and was still experimenting with paper. Handel suggested I try Ersta fine sandpaper. I did and nearly three decades later, I’ve never used anything else.
The paper (UArt makes it now) is acid-free and accepts dry media, especially pastel and charcoal. It allows me to build up layer upon layer of pigment, blend, etc. without having to use a fixative. The tooth of the paper almost never gets filled up so it continues to hold pastel. If the tooth does fill up, which sometimes happens with problem areas that are difficult to resolve, I take a bristle paintbrush, dust off the unwanted pigment, and start again. My entire technique – slowly applying soft pastel, blending and creating new colors directly on the paper (occupational hazard: rubbed-raw fingers, especially at the beginning of a painting as I mentioned in last Saturday’s blog post), making countless corrections and adjustments, looking for the best and/or most vivid colors, etc. – evolved in conjunction with this paper.
I used to say that if Ersta ever went out of business and stopped making sandpaper, my artist days would be over. Thankfully, when that DID happen, UArt began making a very similar paper. I buy it from ASW (Art Supply Warehouse) in two sizes – 22″ x 28″ sheets and 56″ wide by 10 yard long rolls. The newer version of the rolled paper is actually better than the old, because when I unroll it it lays flat immediately. With Ersta I laid the paper out on the floor for weeks before the curl would give way and it was flat enough to work on.
Comments are welcome!
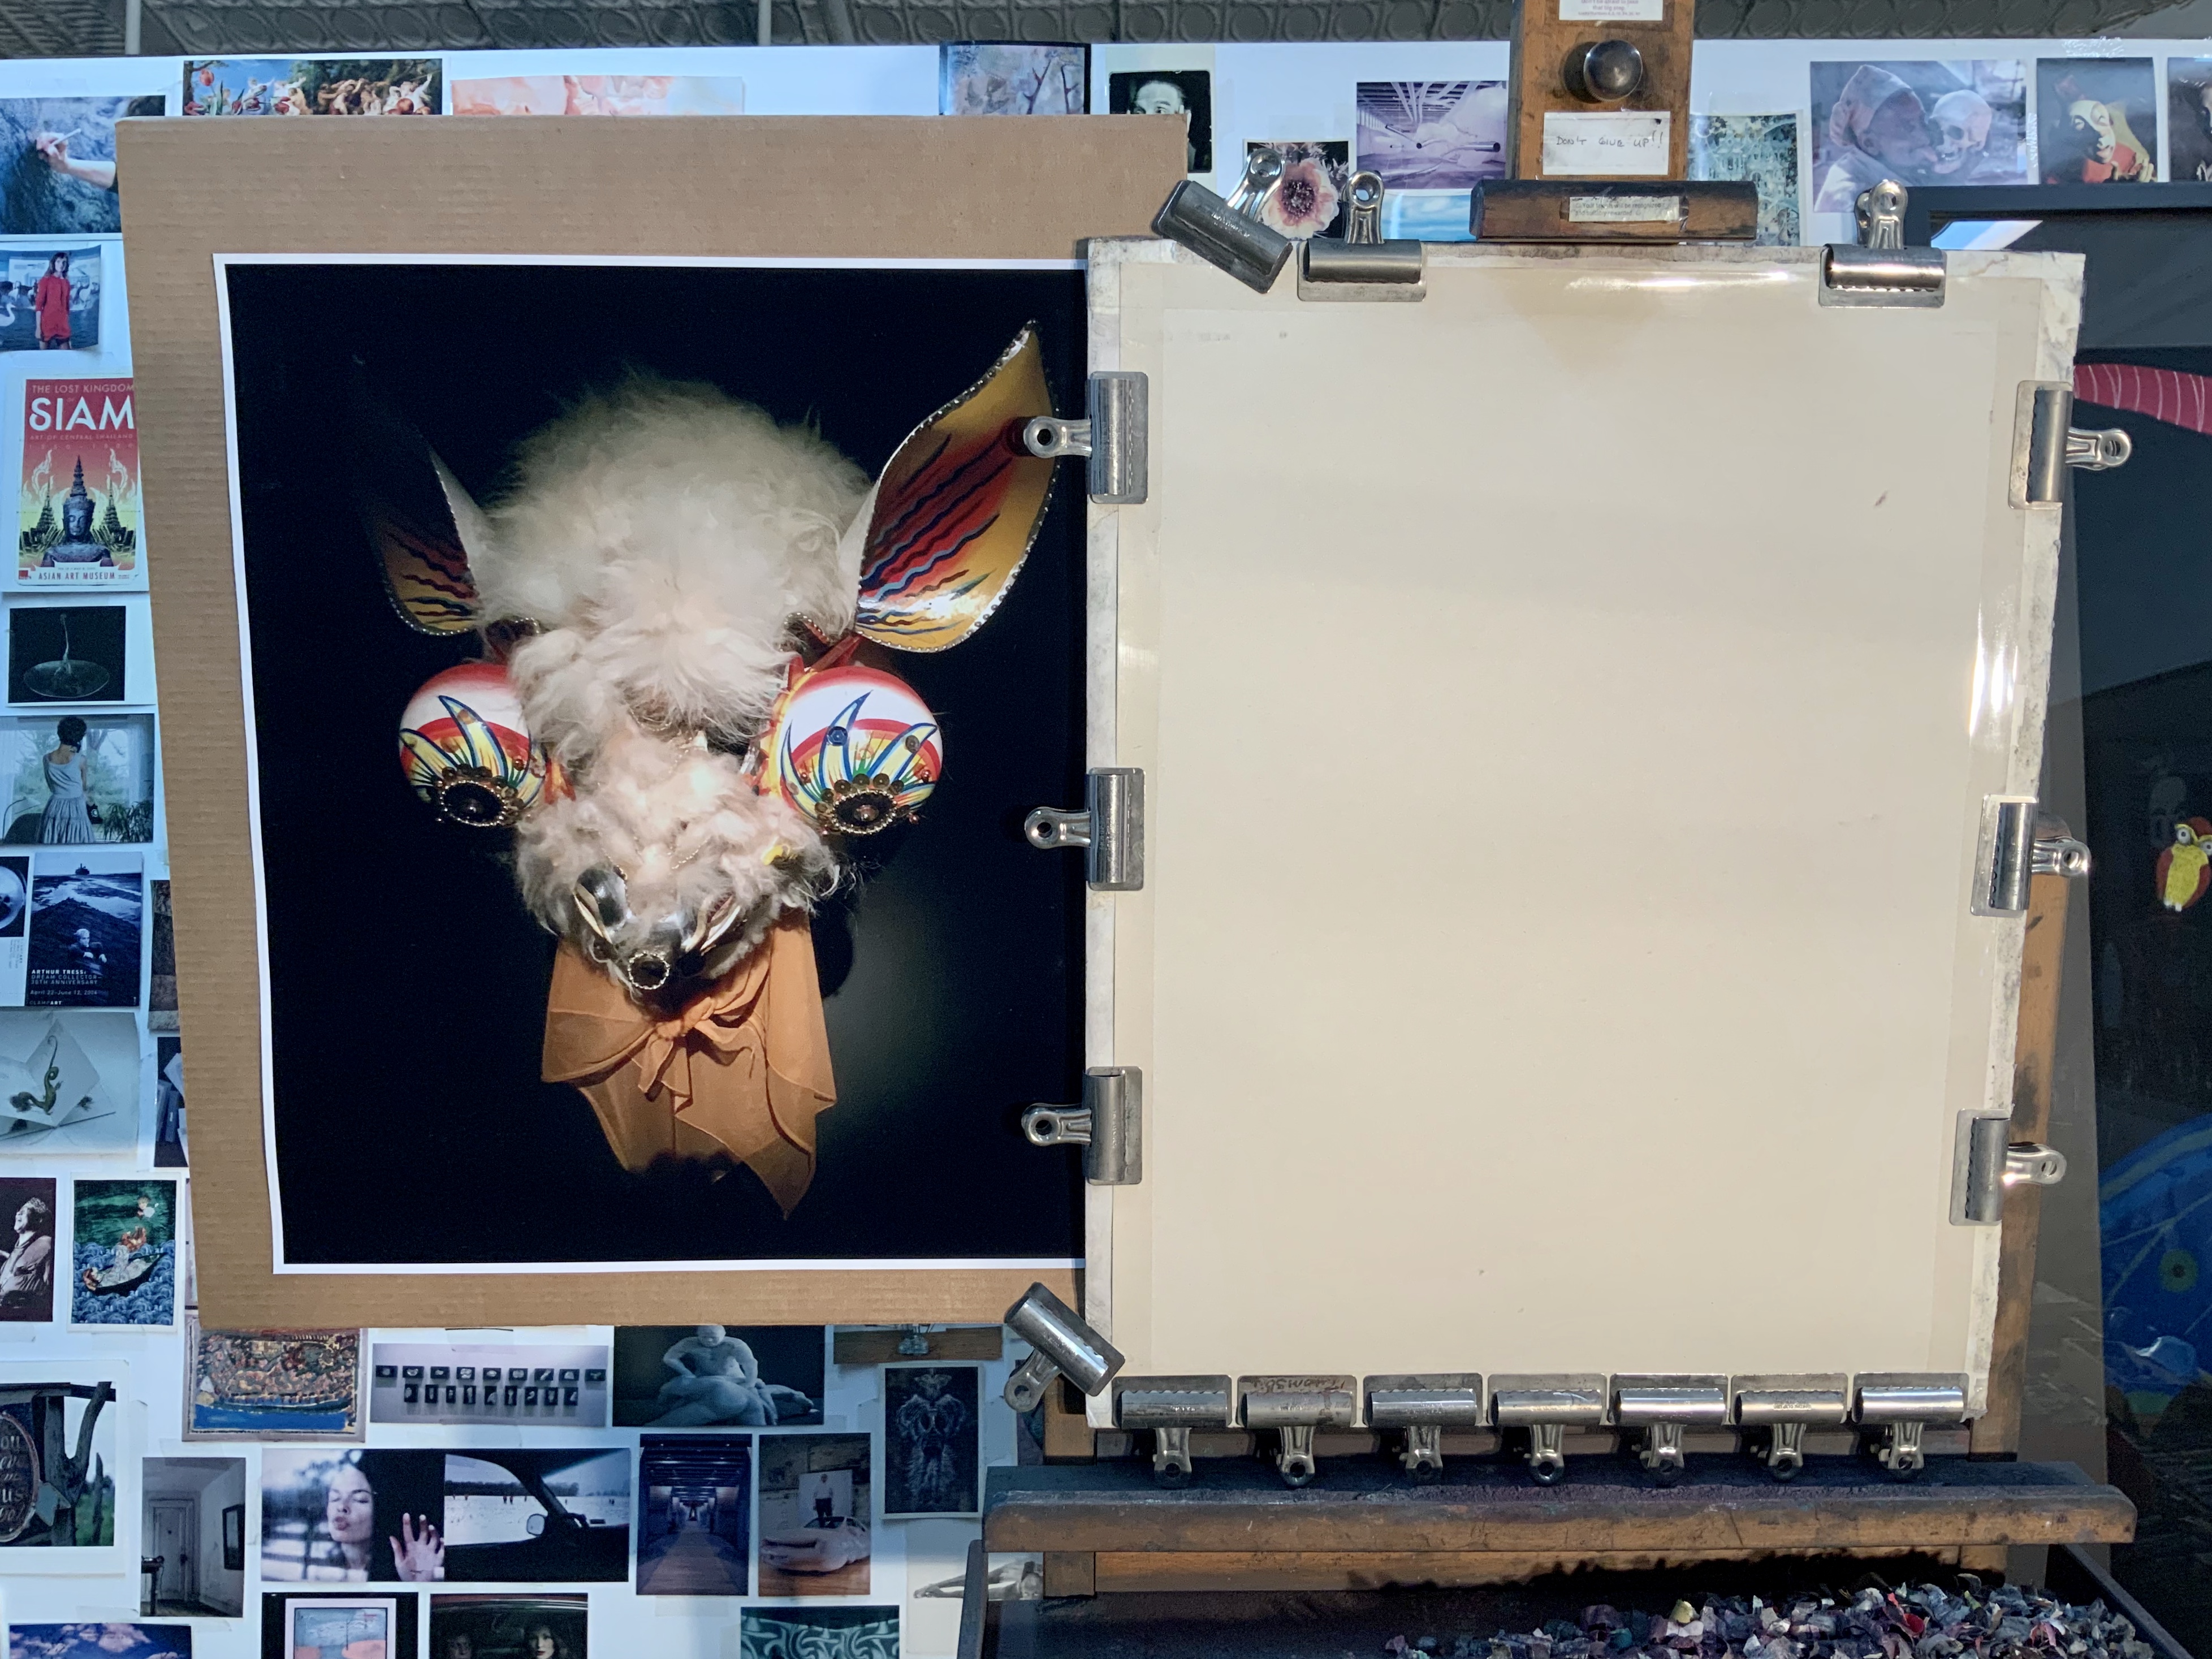
Q: What’s on the easel today?
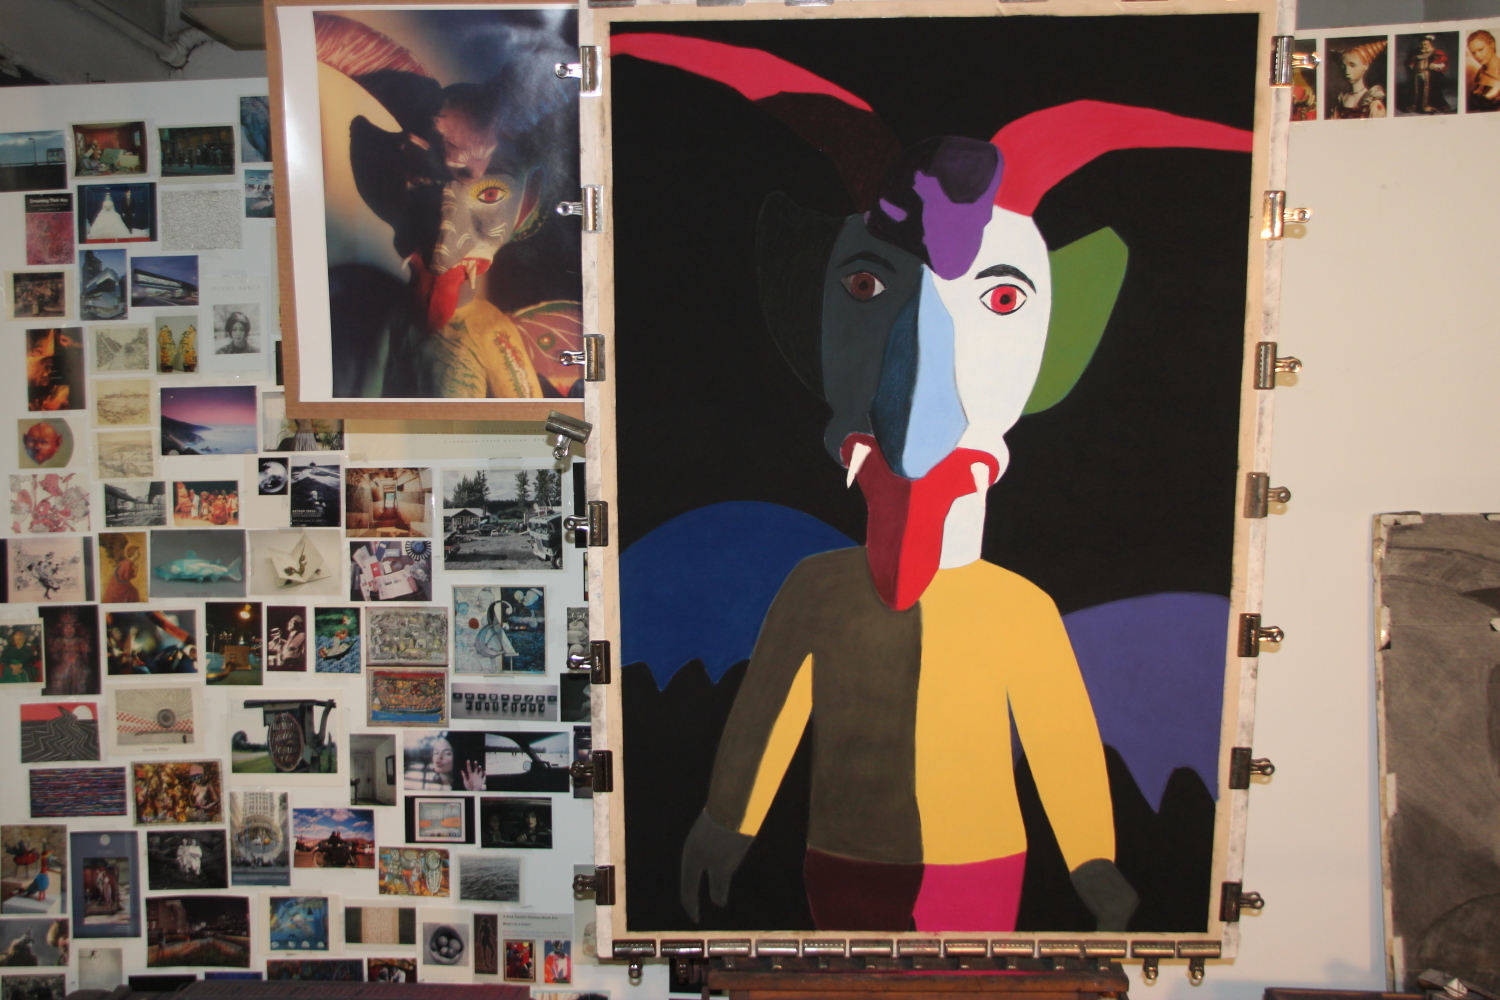
Work in progress, 58″ x 38″
A: Today is a day off to let my fingers heal. When I start a new painting, I need to rub my fingers against raw sandpaper in order to blend the pastel. With each layer the tooth of the paper gets filled up and becomes smooth, but until then my fingers suffer. Here is what I’ve been working on.
This pastel-on-sandpaper painting is an experiment, an attempt to push myself to work with bigger and bolder imagery. The photograph clipped to the easel is one of my favorites. It depicts a Judas that Bryan and I found in a dusty shop in Oaxaca. Among the Mexican and Guatemalan folk art pieces that I’ve collected are five papier mâché Judases. This particular one is unusual because it has a cat’s head attached at the forehead (the purple shape in the painting). They are not made to last. In some Mexican towns large Judases are hung from church steeples, loaded with fireworks, and burned in effigy. This takes place at 10:00 a.m. on the Saturday morning before Easter. Mexico is primarily a Catholic nation, of course, so effigy burning is done as symbolic revenge against Judas for his betrayal of Christ. The Judas in the photo is small and meant for private burning by a family (rather than in public at a church) so by bringing it back to New York I rescued it from a fire-y death! In sympathy with Mexican tradition, I began this painting last Saturday (the day before Easter) at 10 a.m.
Comments are welcome!
Q: How do you know when a pastel painting is finished?

“Big Wow,” soft pastel on sandpaper
A: During the several months that I work on a pastel painting, I search for the best, most eye-popping colors, as I build up and blend together as many as 25 to 30 layers of pigment. I am able to complete some areas, like the background, fairly easily – maybe with six or seven layers – but the more realistic parts take more applications because I am adding details. Details always take time to perfect. No matter how many pastel layers I apply, however, I never use fixatives. It is difficult to see this in reproductions of my work, but the finished surfaces achieve a texture akin to velvet. My technique involves blending each layer with my fingers, pushing pastel deep into the tooth of the sandpaper. The paper holds plenty of pigment and because the pastel doesn’t flake off, there is no need for fixatives.
I consider a given painting complete when it is as good as I can make it, when adding or subtracting anything would diminish what is there. I know my abilities and I know what each individual stick of pastel can do. I continually try to push myself and my materials to their limits.
Comments are welcome.

